Teach Yourself Henna Tattoo: A Comprehensive Guide for Beginners
Are you fascinated by the intricate beauty of henna tattoos and eager to learn how to create them yourself? You’re not alone! The art of henna, also known as Mehndi, has captivated cultures for centuries, and now, with the right guidance, you can unlock your own henna artistry skills. This comprehensive guide provides a step-by-step approach to *teach yourself henna tattoo*, empowering you to create stunning designs from the comfort of your home. We’ll cover everything from understanding the history and cultural significance of henna to mastering application techniques and aftercare, ensuring you achieve beautiful, long-lasting results.
This isn’t just another tutorial; it’s a complete resource built on years of experience and expert advice. We’ll delve into the nuances of henna paste preparation, design principles, and troubleshooting common issues, providing you with the knowledge and confidence to embark on your henna journey. Whether you’re a complete beginner or have some artistic experience, this guide will equip you with the skills to express your creativity through the timeless art of henna.
Understanding Henna: History, Culture, and Safety
Henna, derived from the *Lawsonia inermis* plant, boasts a rich history stretching back thousands of years. Its use in body art, particularly in regions of South Asia, the Middle East, and Africa, is deeply intertwined with cultural traditions and celebratory occasions. Before you *teach yourself henna tattoo*, understanding these roots is crucial for appreciating the art form’s significance.
A Brief History of Henna
The earliest evidence of henna use dates back to ancient Egypt, where it was used for cosmetic purposes, including staining the hair and nails of pharaohs. Over time, henna’s popularity spread across various cultures, evolving into intricate body art designs that held symbolic meanings. In many traditions, henna is associated with good luck, prosperity, and protection.
Cultural Significance of Mehndi
Mehndi, the application of henna as a temporary skin decoration, holds immense cultural significance in many societies. In South Asian weddings, for example, the Mehndi ceremony is a joyous occasion where the bride and her female relatives and friends adorn their hands and feet with elaborate henna designs. These designs often incorporate symbols representing love, fertility, and happiness. Different cultures have unique styles and motifs, reflecting their distinct artistic traditions.
Henna Safety: Natural vs. Black Henna
Before you begin to *teach yourself henna tattoo*, it is IMPERATIVE to understand the difference between natural henna and so-called “black henna.”
* **Natural Henna:** This is derived from the *Lawsonia inermis* plant and produces a stain that ranges from orange to reddish-brown. Natural henna is generally safe for skin application when prepared and applied correctly.
* **”Black Henna”:** This is often a dangerous concoction containing a chemical dye called paraphenylenediamine (PPD). PPD can cause severe allergic reactions, permanent skin scarring, and long-term health issues. **Never use “black henna.”** It is illegal in many countries. Only use henna paste made with natural henna powder, essential oils (like lavender or tea tree), and a safe liquid (like lemon juice or water).
Always purchase your henna powder and essential oils from reputable suppliers and ensure they are specifically intended for body art. Perform a small patch test before applying henna to a larger area to check for any allergic reactions. If you experience itching, burning, or swelling, remove the henna immediately and seek medical attention.
Essential Supplies for Learning Henna Tattoo
To effectively *teach yourself henna tattoo*, you’ll need to gather the right supplies. This section outlines the essential tools and materials you’ll need to get started.
* **Henna Powder:** Opt for high-quality, finely sifted henna powder specifically intended for body art. Look for brands that are known for their purity and consistency. Research different types of henna powder (e.g., Rajasthani, Jamila) to understand their staining properties and color variations.
* **Essential Oils:** Essential oils are crucial for releasing the dye from the henna powder and creating a smooth, workable paste. Lavender, tea tree, and cajeput oils are popular choices. Ensure that the essential oils you use are 100% pure and therapeutic grade.
* **Liquid for Mixing:** Lemon juice, strong black tea, or distilled water can be used to mix the henna paste. Lemon juice is a common choice due to its acidic properties, which help release the dye. Experiment with different liquids to find what works best for your skin and climate.
* **Applicator Bottles or Cones:** Henna paste is typically applied using applicator bottles or cones. Cones are more traditional and allow for greater control over the design. You can purchase pre-made cones or learn how to make your own using cellophane or plastic sheets.
* **Practice Surface:** Before applying henna to your skin, practice on a piece of paper, acetate sheet, or even a fruit like an orange or banana. This will help you get a feel for the applicator and develop your design skills.
* **Transfer Paper (Optional):** If you’re struggling with freehand designs, you can use transfer paper to trace pre-drawn patterns onto your skin. Simply print out your desired design, transfer it onto your skin using transfer paper, and then trace over the lines with henna paste.
* **Sealant (Optional):** A sealant, such as a sugar-lemon mixture or a commercial henna sealant, helps keep the henna paste moist and in contact with your skin, resulting in a darker and longer-lasting stain. Apply the sealant gently over the dried henna paste.
* **Gloves:** Protect your hands from staining by wearing gloves while mixing and applying henna paste.
* **Paper Towels:** Keep paper towels handy for cleaning up spills and wiping the applicator tip.
* **Design References:** Gather design references from books, online resources, or cultural events. Study different styles and motifs to inspire your own creations.
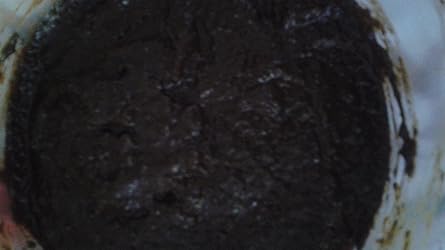
Mixing Your Own Henna Paste: A Step-by-Step Guide
One of the most important aspects of *teach yourself henna tattoo* is learning how to mix your own henna paste. The quality of your henna paste directly affects the outcome of your designs. This section provides a detailed step-by-step guide to mixing henna paste at home.
1. **Gather Your Ingredients:** You will need henna powder, essential oil, lemon juice (or your chosen liquid), a glass or ceramic bowl, and a spoon or spatula.
2. **Measure the Henna Powder:** Start with about 100 grams of henna powder. This amount is sufficient for several small to medium-sized designs. Adjust the quantity depending on your needs.
3. **Add the Essential Oil:** Gradually add the essential oil to the henna powder, mixing thoroughly until the powder is evenly coated. Use about 20-30 ml of essential oil for 100 grams of henna powder. The mixture should resemble damp sand.
4. **Add the Liquid:** Slowly add the lemon juice (or your chosen liquid) to the henna-essential oil mixture, mixing continuously until you achieve a smooth, thick paste. The consistency should be similar to toothpaste or thick yogurt. Avoid adding too much liquid at once, as this can make the paste too runny.
5. **Check for Consistency:** Use a spoon or spatula to test the consistency of the paste. It should be thick enough to hold its shape but still be easily spreadable. If the paste is too thick, add a little more liquid. If it’s too runny, add a little more henna powder.
6. **Allow the Paste to Dye Release:** Cover the bowl with plastic wrap and let the henna paste sit at room temperature for 12-24 hours. This allows the henna dye to release, resulting in a richer and darker stain. The dye release time may vary depending on the temperature and humidity.
7. **Check for Dye Release:** After the dye release period, check the henna paste for dye release. You can do this by dabbing a small amount of paste onto your palm and wiping it off after a few minutes. If it leaves an orange stain, the dye has been released.
8. **Strain the Paste:** Strain the henna paste through a fine-mesh sieve or nylon stocking to remove any lumps or coarse particles. This will ensure a smooth and consistent flow from the applicator.
9. **Transfer to Applicator:** Transfer the strained henna paste to your applicator bottle or cone. Make sure to seal the applicator tightly to prevent the paste from drying out.
Mastering Henna Application Techniques
Once you’ve prepared your henna paste, it’s time to *teach yourself henna tattoo* application techniques. This section covers the fundamental techniques you’ll need to create beautiful and intricate designs.
* **Holding the Applicator:** Hold the applicator like a pen, with your index finger and thumb controlling the flow of henna paste. Keep your hand steady and practice applying even pressure to create consistent lines.
* **Creating Lines:** Start by practicing drawing straight lines, curves, and dots on your practice surface. Experiment with different pressures and angles to achieve varying line thicknesses.
* **Filling in Shapes:** Use small, overlapping strokes to fill in shapes and create solid areas of henna paste. Avoid leaving gaps or uneven areas.
* **Creating Intricate Details:** Use a fine-tipped applicator to create intricate details such as swirls, paisleys, and floral motifs. Practice drawing these details on your practice surface until you feel comfortable applying them to your skin.
* **Using Stencils:** If you’re struggling with freehand designs, you can use stencils to create more complex patterns. Simply place the stencil on your skin and apply henna paste over the open areas. Remove the stencil carefully and allow the henna paste to dry.
* **Correcting Mistakes:** Don’t worry if you make mistakes. Use a cotton swab dipped in water or lemon juice to gently wipe away any unwanted henna paste. You can also use a toothpick to refine the edges of your design.
Henna Design Principles and Inspiration
To truly *teach yourself henna tattoo*, you need to understand the principles of design and find inspiration from various sources. This section explores the key elements of henna design and provides tips for finding inspiration.
### Key Elements of Henna Design
* **Symmetry:** Symmetry is a fundamental principle in henna design. Many designs feature symmetrical patterns, creating a balanced and harmonious appearance.
* **Balance:** Balance refers to the distribution of visual weight in a design. A well-balanced design will feel visually pleasing and stable.
* **Proportion:** Proportion refers to the relationship between the sizes of different elements in a design. A design with good proportion will have a sense of harmony and unity.
* **Rhythm:** Rhythm refers to the repetition of elements in a design. A rhythmic design will have a sense of movement and flow.
* **Contrast:** Contrast refers to the difference between different elements in a design. A design with good contrast will be visually interesting and dynamic.
### Finding Henna Design Inspiration
* **Cultural Traditions:** Explore the henna designs of different cultures, such as Indian, Moroccan, and Sudanese. Study the motifs, patterns, and techniques used in these traditions.
* **Nature:** Draw inspiration from the natural world, such as flowers, leaves, vines, and animals. Incorporate these elements into your designs to create a unique and organic look.
* **Geometric Patterns:** Experiment with geometric patterns, such as circles, squares, triangles, and spirals. These patterns can add a modern and contemporary touch to your designs.
* **Online Resources:** Browse online resources such as Pinterest, Instagram, and henna design websites for inspiration. Save your favorite designs and use them as a starting point for your own creations.
* **Books and Magazines:** Consult books and magazines on henna design for detailed tutorials, design ideas, and cultural insights.
Henna Aftercare: Achieving a Dark and Long-Lasting Stain
Proper aftercare is crucial for achieving a dark and long-lasting henna stain. This section provides detailed instructions on how to care for your henna tattoo after application.
* **Keep the Henna Paste Moist:** Apply a sealant, such as a sugar-lemon mixture or a commercial henna sealant, over the dried henna paste. This will help keep the paste moist and in contact with your skin, resulting in a darker stain. Reapply the sealant every few hours.
* **Keep the Area Warm:** Wrap the hennaed area with plastic wrap or medical tape to create a warm and humid environment. This will help the henna dye penetrate your skin more effectively.
* **Avoid Water Contact:** Avoid washing the hennaed area for at least 2-6 hours after application. Water can prevent the henna dye from fully penetrating your skin.
* **Remove the Henna Paste Carefully:** After 2-6 hours, gently scrape off the dried henna paste. Avoid washing it off with water, as this can lighten the stain.
* **Apply Natural Oil:** Apply a natural oil, such as coconut oil, olive oil, or sesame oil, to the hennaed area. This will help moisturize your skin and protect the stain from fading.
* **Avoid Harsh Chemicals:** Avoid using harsh soaps, detergents, or lotions on the hennaed area. These chemicals can strip away the henna dye and cause the stain to fade more quickly.
* **Avoid Exfoliation:** Avoid exfoliating the hennaed area, as this can remove the outer layers of skin and cause the stain to fade. Be gentle when washing and drying the area.
* **Protect from Sunlight:** Protect the hennaed area from direct sunlight. Sunlight can cause the henna dye to fade more quickly.
Troubleshooting Common Henna Problems
Even with the best preparation and application techniques, you may encounter some common problems when you *teach yourself henna tattoo*. This section provides solutions to these problems.
* **Faint Stain:** If your henna stain is faint, it could be due to several factors: poor quality henna powder, insufficient dye release, improper aftercare, or skin type. Ensure you are using high-quality henna powder, allowing sufficient dye release time, following proper aftercare instructions, and understanding how your skin type affects henna staining.
* **Uneven Stain:** An uneven stain can be caused by uneven application of henna paste, variations in skin temperature, or inconsistent aftercare. Apply henna paste evenly, maintain a consistent temperature, and follow aftercare instructions carefully.
* **Allergic Reaction:** Although rare with natural henna, allergic reactions can occur. If you experience itching, burning, or swelling, remove the henna paste immediately and seek medical attention. Always perform a patch test before applying henna to a larger area.
* **Cracked Paste:** If the henna paste cracks or dries out too quickly, it can prevent the dye from properly penetrating your skin. Use a sealant to keep the paste moist and in contact with your skin. You can also add a little sugar or honey to the henna paste to help it retain moisture.
* **Clogged Applicator:** A clogged applicator can make it difficult to apply henna paste smoothly and evenly. Use a fine-mesh sieve or nylon stocking to strain the henna paste before transferring it to the applicator. Clean the applicator tip regularly to prevent clogging.
Advanced Henna Techniques and Styles
Once you’ve mastered the basic techniques, you can explore advanced henna techniques and styles to further enhance your skills. This section introduces some popular styles and techniques.
* **Indian Mehndi:** Indian Mehndi is characterized by intricate and elaborate designs that often cover the hands and feet. These designs typically incorporate floral motifs, paisleys, and geometric patterns.
* **Moroccan Henna:** Moroccan henna is characterized by geometric patterns and abstract designs. These designs often feature bold lines and symmetrical shapes.
* **Sudanese Henna:** Sudanese henna is characterized by bold and graphic designs that often cover the hands and feet. These designs typically feature geometric patterns, tribal motifs, and bold lines.
* **White Henna:** White henna is not true henna, but rather a cosmetic body paint that creates a white design on the skin. It is often used for bridal henna and special occasions.
* **Jagua Henna:** Jagua henna is a natural dye derived from the *Genipa americana* fruit. It produces a dark blue or black stain on the skin. Jagua henna is often used as an alternative to black henna.
Expert Q&A on Teaching Yourself Henna Tattoo
Here are some frequently asked questions, answered with expert insights, to further guide you on your journey to *teach yourself henna tattoo*.
**Q1: How long does a henna tattoo typically last?**
*A: A natural henna tattoo typically lasts for 1-3 weeks, depending on your skin type, aftercare, and the quality of the henna paste. Frequent washing, exposure to harsh chemicals, and exfoliation can shorten the lifespan of the stain.*
**Q2: Can I use henna to cover up scars or blemishes?**
*A: Yes, henna can be used to cover up scars or blemishes. However, the henna stain may appear slightly different on scar tissue compared to normal skin. It’s best to choose a design that incorporates the scar or blemish into the overall pattern.*
**Q3: How can I make my henna stain darker?**
*A: To achieve a darker henna stain, use high-quality henna powder, allow sufficient dye release time, keep the henna paste moist and warm, avoid water contact after application, and apply natural oil to the hennaed area.*
**Q4: Is it safe to use henna on pregnant women or children?**
*A: Natural henna is generally considered safe for pregnant women and children. However, it’s always best to consult with a healthcare professional before using henna, especially if you have any underlying health conditions or allergies. Never use “black henna” on pregnant women or children.*
**Q5: How do I remove a henna tattoo if I don’t like it?**
*A: Unfortunately, you can’t completely remove a henna tattoo immediately. However, you can fade the stain more quickly by exfoliating the skin, using lemon juice, or applying a bleaching cream. The stain will eventually fade naturally over time.*
**Q6: What are the best essential oils to use for henna paste?**
*A: Lavender, tea tree, and cajeput oils are popular choices for henna paste. These oils contain monoterpene alcohols, which help release the dye from the henna powder.*
**Q7: Can I use henna on my hair?**
*A: Yes, henna can be used to dye your hair. However, hair henna typically contains different ingredients than body art henna. Make sure to use a henna product specifically intended for hair coloring.*
**Q8: How can I prevent my henna paste from clogging the applicator?**
*A: To prevent clogging, strain the henna paste through a fine-mesh sieve or nylon stocking before transferring it to the applicator. Also, clean the applicator tip regularly to remove any dried henna paste.*
**Q9: What is the significance of different henna designs?**
*A: The significance of different henna designs varies depending on the culture and tradition. Some designs symbolize love, fertility, and happiness, while others represent protection, good luck, and prosperity. Research the cultural meanings of different motifs to add depth and meaning to your designs.*
**Q10: Can I sell henna tattoos as a business?**
*A: Yes, you can sell henna tattoos as a business. However, it’s important to comply with all local regulations and obtain any necessary licenses or permits. Also, make sure to use high-quality, safe henna paste and follow proper hygiene practices.*
Conclusion: Embrace the Art of Henna
Learning to *teach yourself henna tattoo* is a rewarding journey that combines artistic expression with cultural appreciation. By understanding the history, techniques, and aftercare involved, you can create beautiful and meaningful designs that reflect your unique creativity. Remember to prioritize safety by using only natural henna and following proper hygiene practices. The art of henna is a continuous learning process, so don’t be afraid to experiment, explore different styles, and find inspiration from various sources.
Now that you’re equipped with the knowledge and skills to embark on your henna journey, we encourage you to share your creations and experiences with the henna community. Connect with other artists, exchange ideas, and inspire each other to push the boundaries of henna art. If you’re interested in taking your skills to the next level, consider exploring advanced techniques or seeking guidance from experienced henna artists. Share your first henna tattoo designs in the comments below! We’d love to see what you create.
